| Tips for
Teachers Fasttrack to America's Past |
Return
to Originating Page |
|
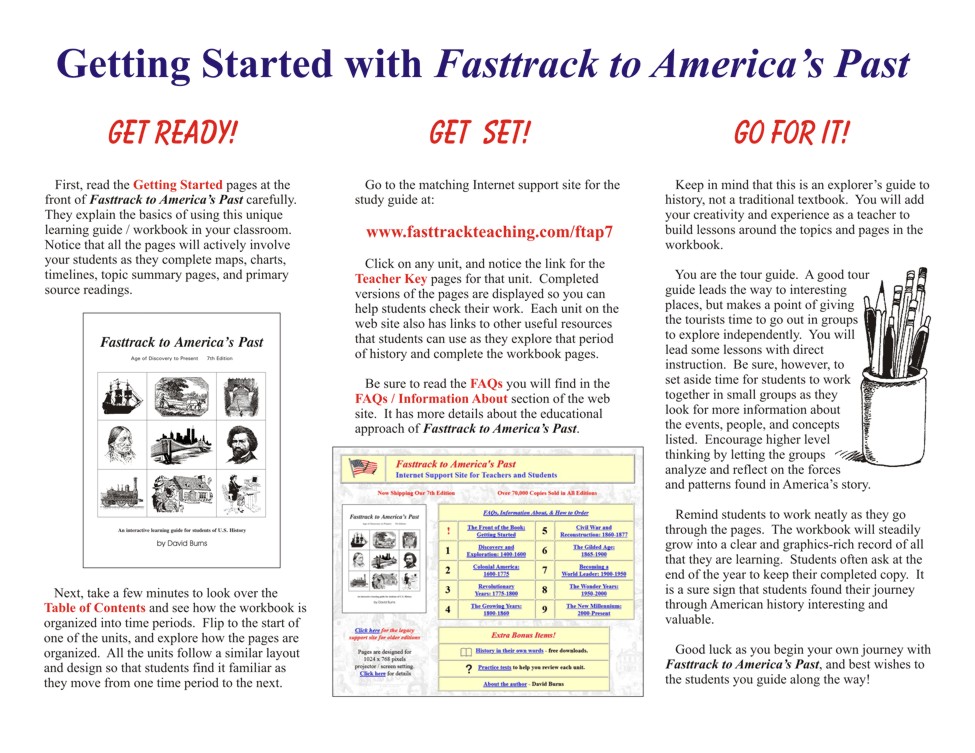
Fasttrack to America's Past: It is always a hectic week getting ready for the start of school, but it is also an exciting time! The students are eager, as anyone can see when the doors open that first day. Always remember that it is an honor to serve in our profession. 1. Job One: Help students get organized as school begins!  Students
are naturally excited as
the year begins, so tap that enthusiasm and show them that staying
organized and keeping their work neat will help them succeed in school
and in life. Students
are naturally excited as
the year begins, so tap that enthusiasm and show them that staying
organized and keeping their work neat will help them succeed in school
and in life.As you photocopy the learning guide's pages for your students, be sure to preserve the double page spread layout design. Photocopy and hole punch the pages for the first section. When it's time to get started, you will set them out for students to pick up assembly line style and place in their history notebook binder. (Don't photocopy the entire workbook at once - do it a section at a time, as you move through the content during the year!) Have a plan for how you want their notebook binders organized, and show them an example. As the first grading period gets underway, check for binders and supplies so everyone can get a positive start. Tell students you will do quick in-class page checks for credit periodically. Students will quickly begin taking ownership of their work and progress in learning. (Think of how many kids get to freshman year of college or vocational trade school and struggle because no teachers in earlier levels ever insisted that they develop this key skill for success.) Demonstrate good organization yourself, by having a clearly written grading policy, class syllabus, and a supplies list ready to go. Have a fun and engaging classroom "getting to know you" activity planned. 2. Lay out your Great Expectations. Explain from day one that in your class students will be active explorers of America's past. Let them know that this subject has all the best and most interesting people, events, and stories to learn about and experience. Tell them they will grow and show their skills as they choose and complete an in-depth project of their own design each semester. Give examples of project ideas, and tell them that their projects must have a "real world" end product:
3. Consider your "teacher as tour guide" choices. There are many ways to use the Fasttrack to America's Past learning guide effectively. A blended strategy of direct, teacher-led instruction mixed with lots of student self-directed and group activities is often the best choice. No one wants to go on a trip with a tour guide who won't give them time to go out on their own or with friends to explore the famous places and sights. There are lots of possibilities for structuring exploring time for your students, including group work and individual work completing the pages of each section. One choice, for example, is to form teams of three or four students that stay together and work together through a grading period.  4. Use great DVD and YouTube video
resources. 4. Use great DVD and YouTube video
resources.High quality historical video clips can and will ignite student interest if used wisely and frequently. One of the best resources for U.S. history classrooms is the History Channel DVD set titled America: The Story of US. The three disc set is less than $20.00 on Amazon. It has many superb segments that help teach about key events, people, and concepts in an intellectually and emotionally engaging way. There is a list of other recommended History Videos & Movies you can find with a link on the Home Page. Preview videos carefully, then pick the segments that will work best to meet your instructional objectives. Shorter is usually better than longer, and never run any video just to be a time-filler. When video clips are longer than about eight or ten minutes, pause the playback at intervals to emphasize a point or ask a few questions to check for student understanding. Start building your own collection of classroom video hits. Create a three ring binder with dividers organized by unit. Each video you preview gets its own page (or pages, for longer videos). Jot down running notes of the content, with the timing of the various scenes / segments from the head of the video. Mark the best parts with a highlighter - you only want to show the best parts! As that notebook grows it will improve your classroom year after year. 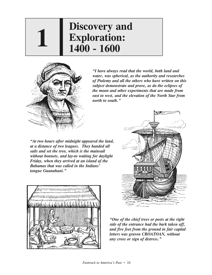 5. Always begin lessons by linking to
what
students already know. 5. Always begin lessons by linking to
what
students already know.When it is time to get your class started on the first unit - Discovery and Exploration - divide students into groups of three or four. Have everyone look at the Section 1 title page. Ask the groups to examine and discuss the images first, then decide who or what each image might be showing. Have the students examine each quote, and discuss with each other what each quote seems to be about, and who might have said or written it. Remind students they can jot short notes down right on the page. When ready, ask one person from each group to share out what the group discussed about one of the images or quotes. If you have computers available, have the groups do online searches to see if they can find information giving a positive ID for the quotes. (Not just from going to the Teacher Key for this section, of course!) Tell students they don't need to type in an entire quote in a search box, but just type in unique sounding phrases. 6. Explain the learning guide's format. Show students the different kinds of pages they will be working with in this section (and all the others). Have them look at the timeline double page spread as you project it on your classroom screen. See if students can easily answer questions you make up based on the timeline. Show the word bank at the bottom of the facing page, and try to do a few of the "fill in the blank" statements together. 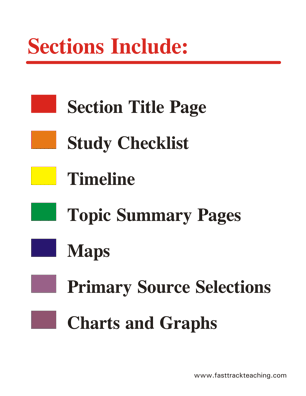 Point out the first
topic summary page in this
section - New Worlds Discovered
- with the
key vocabulary terms list on top. Tell students that when they
read a topic summary page, they should give it a careful read-through,
then go back and read it again,
highlighting (or underlining) the vocabulary terms where they first
appears in the text. Point out the first
topic summary page in this
section - New Worlds Discovered
- with the
key vocabulary terms list on top. Tell students that when they
read a topic summary page, they should give it a careful read-through,
then go back and read it again,
highlighting (or underlining) the vocabulary terms where they first
appears in the text. Show how they will complete the map pages with color pencils, using the maps in Section 1 of this web site as their model. (Many teachers find it best to make coloring the maps homework, rather than using class time. But be available after school one day a week for those who need help for the maps or other work.) Look with students at one of the charts / graphs pages, and check that students know the difference between line graphs, bar graphs, and pie charts. Point out the data tables that will provide the numbers they will use to complete the charts and graphs. Don't just talk, though. Let students read the selection "The Mystery of the Lost Colony." (Most students have at least heard of it, and you can point out the location on the map.) Ask students to highlight or underline sentences in the reading they find interesting or want to know more about. They can jot notes in the margins. Ask a few students what they picked to highlight. Show this Internet site on your big screen, and point out the link in Section 1 that goes to a web site that tells more about the Lost Colony. Tell them each section has links to interesting web sites they can explore in class or at home. Have students read the "Getting Started / Dear Students" pages at the front of the learning guide. 7. Get your classroom Audio/Visual game on! Great videos won't impress students if the picture or sound quality is below par. Don't project your videos on the classroom white board - it shows bad glare to the students near the center of the room, and won't show the video very well to anyone. Use a pull down screen, and adjust for the largest clear and bright image possible. Daylight from windows will wash out the screen image, so be sure you have blinds, curtains, or some other way to darken the room. Be sure the seat layout allows all students a good view. There is a link on the Home Page that will give you suggestions for setting the best screen resolution of your LCD projector. Sound matters just as much as the video image. A small stereo amplifier and a set of speakers will lift the presentation from blah to WOW! Those speakers in the LCD projector itself can't fill a classroom. The little speaker sets meant for desktop computers at home are not much better. You don't need to spend a lot - check with parents who might have an old amplifier or pair of speakers sitting in a closet, or get a deal at a local thrift store. Here's a diagram for an LCD projector setup with lots of flexibility: 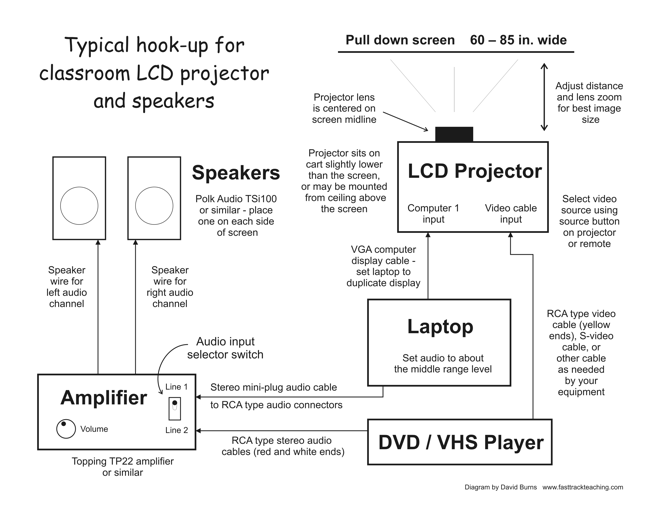 You can download (PDF format) and print this diagram by clicking here. 8. Always begin your classes with a warm-up activity. Have three to five review questions (fill in the blank or short answer) on the board or big screen that students can answer on paper as soon as they arrive. This gives students a specific, every day routine that helps them get settled and focused, and it gives you time to take attendance. Let them use the pages of Fasttrack to America's Past and notes to find or check any answers they aren't sure about. Let them make corrections as you go over the answers. That way every class starts with success, and with everyone tuned into key points from the previous lesson. Be sure to add a positive comment as you finish the warm-up: "Great, it's good to see everyone today, and that everyone is up to speed with what we did yesterday." You can download a warm up sheet (PDF format) good for 6 class days by clicking here. It is also a good idea to end each class with either a written "exit ticket" or a few verbal questions to reinforce key points before the bell. Example: "Anyone in these two rows: Who was the key leader in Great Britain during World War II?" "Winston Churchill!" "Great, next two rows . . ." Before dismissing students, be sure to end on a positive note: "I really appreciate that everyone was on time and attentive today," or "Good questions and comments today - I enjoyed it! See you tomorrow!"  9.
Get students out
exploring
museums, historic sites, and antique shops. 9.
Get students out
exploring
museums, historic sites, and antique shops. Students will learn more and connect to your class better if they get out to where history was made, and to places where the past can be seen, touched, and even - in the case of antique shops - brought home. Offer extra credit for visits, but explain that students who want the credit must create something to show the class: a display poster with photos, a PowerPoint slide show, or a short highlights video. If they want to bring friends and make it a group event, that's even better - as long as the parents approve. 10. Be an inspiration! As a teacher, your job is not primarily to create future historians or Ivy League graduates. A much more vital purpose is to help all students find meaning and purpose in their own lives through lessons found in the story of the past. Events and dates are important, but more important are lessons such as these that history reveals: that life is joyous; that life is a struggle; that we create our own destinies; that we are part of larger patterns inherited from generations gone by. Share with students stories from the past that carry our civilization's values and point the way to a worthy life. Tell your own personal stories, tied where you can to themes in American history. Let people from America's past and present share their inspiring words with your students. Students want help finding the path to a good life - don't leave them hanging. Here are just a few examples of thought-provoking short videos you can find online: Rev. Martin Luther King's advice for students - Click here You are more beautiful than you think - Click here A man has "No Arms, No Legs, No Worries" - Click here 11. Don't forget to have fun! No one is going to enjoy a history class without some excitement, suspense, and fun. Make time to work in activities, videos, projects, music, and stories that students will still be talking about when they get home. Now and then, allow "Students' Choice" time on the computers, encouraging them to freely explore any units / topics / links they are interested in anywhere on the class web site. If you have your own classroom, consider making a mini-museum of items that lend an historical feel to the space. Old artifacts make great "hooks" as you start a unit, and can help with teaching about many specific topics. Best of all, students love touching and asking about objects on display! Below: A classroom showing a
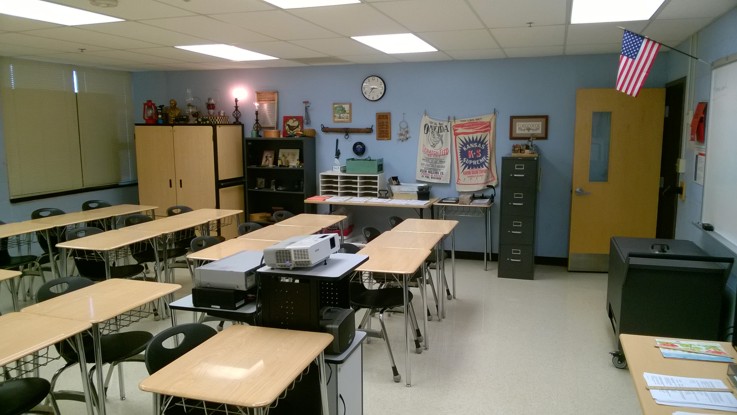
60 inch wide pull down screen and LCD projector arrangement. This
size works well for showing standard format (4:3 screen ratio) videos
and web sites. A 72 inch wide screen, however, will offer better
visibility for videos with wide screen (16:9) format.
 Below: This classroom
collection of historical artifacts includes railroad
spikes, a vintage coal miner's lunch bucket,
wheat from the Great Plains, lanterns that once
used Standard Oil kerosene, a flour sifter, and a woman's
apron hand made from feed bag cloth in the 1930s. Some
of the other items: a
(reproduction) 1902 Sears catalog, an old style washboard, an iron
horseshoe and farm tools made by a blacksmith, steel bolts, 78 and 45
rpm
records, lumps of coal, copper ore, bobbins
from a textile mill, (reproduction) Edison style light
bulbs, a Shaker sewing box, and old machine tools.
 |
 An
art student might create a dozen sketches of child labor in the late
1800s, and
create an exhibit with well-written explanatory captions.
An
art student might create a dozen sketches of child labor in the late
1800s, and
create an exhibit with well-written explanatory captions.|
Copyright Notice
Copyright 2009,
2022 by David Burns. All rights
reserved.
|